
Pre-Installation Preparation for Combined Instrument Transformer
Before I even move a wrench, I treat pre-checks as the most important step in how to install a combined instrument transformer. A combined CT-VT is a precision metering and protection device, and small mistakes here become big problems later in service.
Verify Technical Documents First
Start at the desk, not at the plinth:
Check the rating plate against the project specification: primary voltage (11 kV / 33 kV), CT ratios, VT ratios, frequency, insulation level, and BIL.
Compare CT data (ratio, burden, accuracy class 0.2s / 0.5 / 5P10, cores for metering vs protection) with the relay and meter requirements.
Confirm VT data (ratio, burden, accuracy class) against the metering unit one-line diagram.
Review the latest test reports (routine and type tests) and confirm serial numbers match the nameplate.
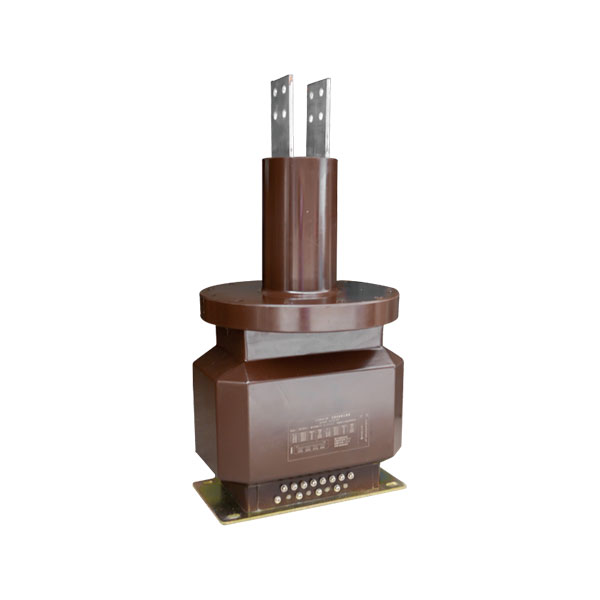
Open the GA drawing (general arrangement) to verify terminal box orientation, bushing layout, lifting points, and overall dimensions fit the foundation and cable routing.
Pro tip: I keep a printed GA drawing and rating plate photo in the field so the crew and I are always working from the same reference.
Check the Scope of Supply on Arrival
Before unpacking fully, I perform a quick “scope vs PO” check:
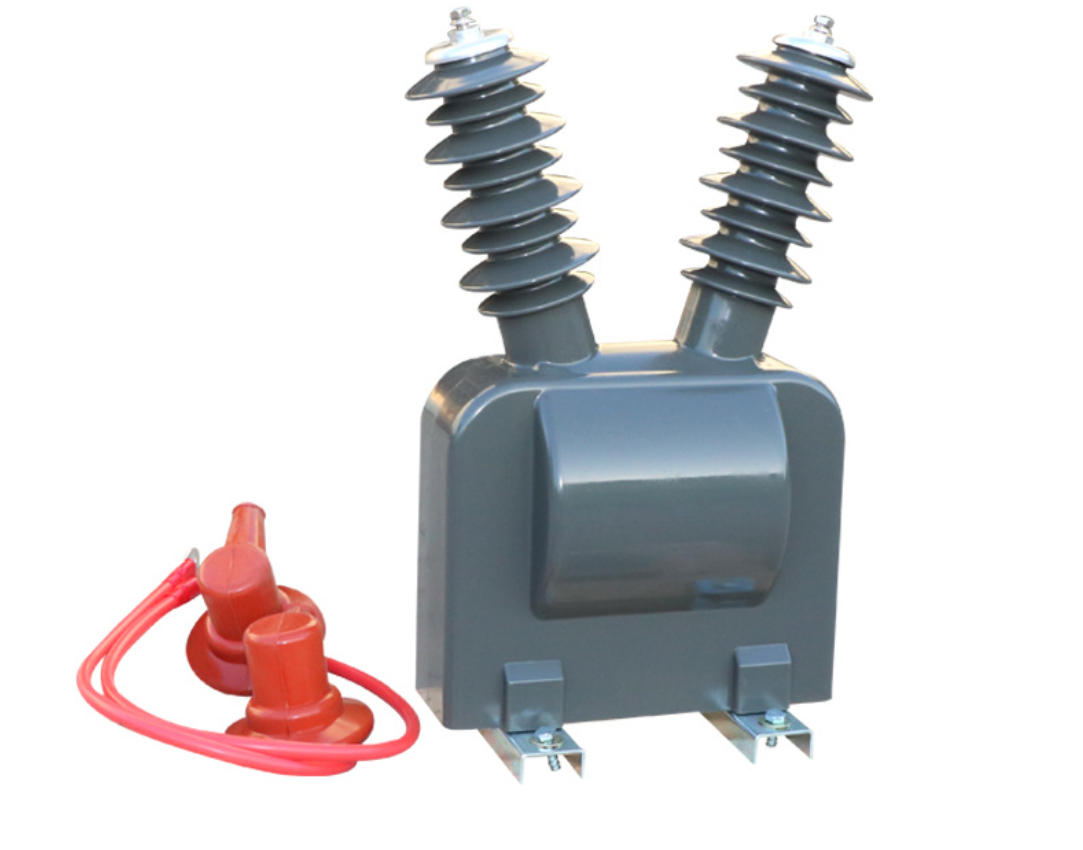
Confirm all bushings are intact, clean, and correctly marked (P1/P2, phases A–B–C).
Inspect the secondary terminal box: glands, terminals, shorting links, and space for control cables.
Check the oil level on the gauge for oil-filled combined transformers; the float should be in the correct zone for ambient temperature.
Verify lifting lugs and eyebolts are present, undamaged, and rated for the full unit weight.
Make sure all accessories are on hand: nameplate, earthing pads, cable glands, breather, and hardware.
Pro tip: I log all shortages immediately; fixing missing accessories later delays energization and creates safety shortcuts.
Tools and PPE You Must Have
For professional combined CT-VT installation, I standardize the toolkit:
Insulated torque wrench and sockets rated for the system voltage
Calibrated multimeter, clamp meter, and insulation tester (Megger)
Crimping tools, lugs, ferrules, and heat-shrink sleeves
Spirit level or digital level for checking verticality
Lifting slings, shackles, and spreader beam rated for the transformer weight
Required PPE:
Arc-rated clothing, insulated gloves, safety glasses, or a face shield
Safety shoes, a hard hat, and hearing protection were required
Fall protection when working at height
Warning: Never allow anyone near the unit without proper PPE once it is moved into the switchyard or substation bay.
Confirm Ratio, Burden, and Accuracy Class
Before installation, I always cross-check the electrical performance against the project design:
Verify CT ratio selection aligns with expected load and fault levels, and that the connected relay/meter burdens do not exceed the CT-rated burden.
Confirm VT ratio matches the metering and protection input range (for example, 11 kV / √3 to 110 V / √3).
Check accuracy class (e.g., 0.2s for revenue metering, 0.5 for general metering, 5P10 or 10P for protection) against the single-line diagram and relay settings.
Ensure each CT core is clearly tagged (e.g., metering, protection, SCADA) and matches the current transformer installation guide or project wiring diagram.
Pro tip: If there is any mismatch between the rating plate, drawings, and relay settings, I stop the installation and resolve it in writing. It is far easier to correct a ratio or class mismatch now than after commissioning.
Safety Precautions Before Installing a Combined Instrument Transformer

Before you think about how to install a Combined Instrument Transformer, lock in your safety steps. On U.S. sites, this is non‑negotiable—especially when these CT‑VT units sit inside gear like an outdoor ring main unit.
Isolate and ground the high-voltage line.
Always de-energize, lockout/tagout, and apply visible grounding on the incoming and outgoing feeders. Verify absence of voltage with an approved tester before anyone goes near the primary terminals.Never leave a VT secondary open-circuited.
An open-circuit voltage transformer secondary can rise to dangerous levels and damage the winding or shock a tech. Keep VT secondaries either connected to the load or safely shorted/grounded as per the design during work.Always short CT secondaries before work.
A current transformer with its primary energized and its secondary open can generate a lethal voltage. Use approved shorting links or test blocks to short S1–S2 any time the wiring is disconnected or meters/relays are removed.Use a formal permit-to-work system.
Treat this like any medium-voltage job: written permits, clear roles, documented switching steps, and a final sign-off. No one should touch CT, VT, or primary terminations until the permit confirms isolation, grounding, and CT/VT secondary status.
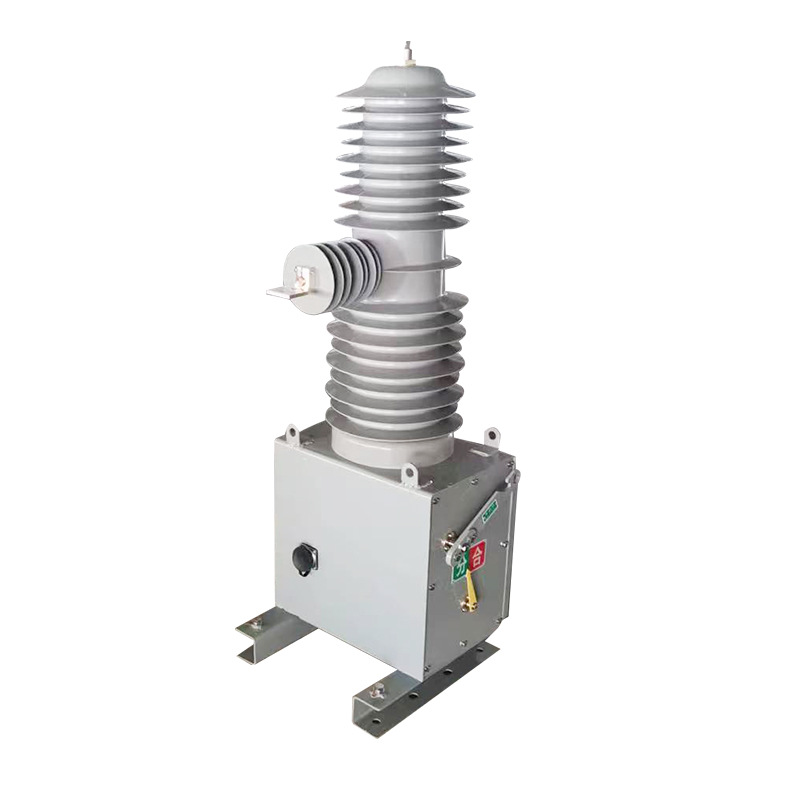
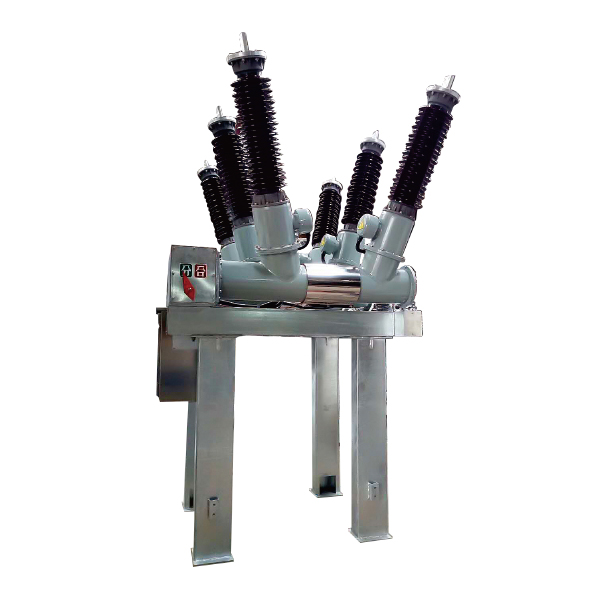
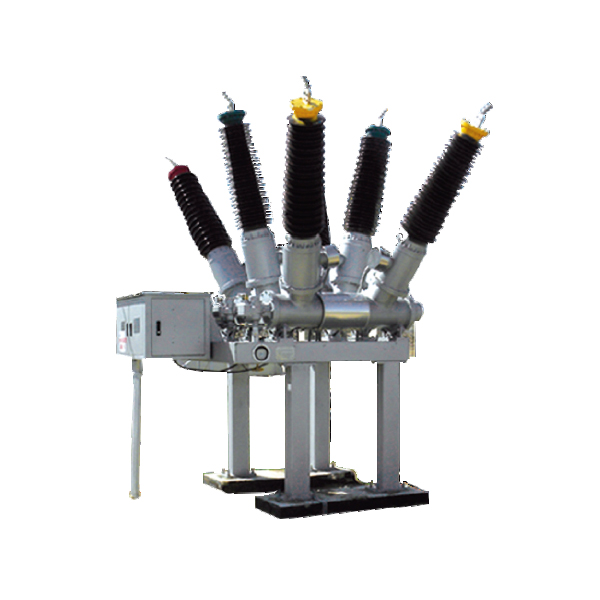
Physical mounting and alignment of the combined instrument transformer

For a safe and accurate combined CT-VT installation, I always start with the base. Use a rigid concrete foundation or steel plinth designed to match the GA drawing and anchor bolt pattern. The plinth must be level, rated for the full weight of the combined instrument transformer plus wind and seismic loads common in many U.S. utilities, and high enough to keep the base above standing water or snow.
When lifting and positioning, treat the unit like any other high-voltage device or outdoor vacuum switchgear:
Use only the marked lifting lugs.
Check crane capacity, rigging angles, and tag lines.
Keep personnel out of the swing and drop zone at all times.
Once on the plinth, perform a full leveling and verticality check with a spirit level or laser level. A tilted tank can affect oil level, dielectric strength, and long-term accuracy.
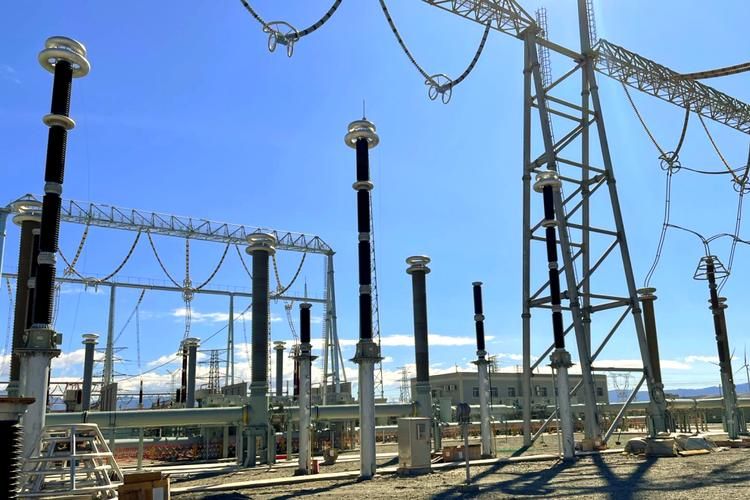
For outdoor 11kV and 33kV combined transformer installations, maintain utility or NEC-based minimum clearances (phase-to-phase and phase-to-ground) and allow space for live-line tools and truck access. For indoor metering cubicles or metal ring network switchgear, verify that the enclosure height, busbar position, and door swing keep all live parts within specified clearances. This physical layout work is where “How to Install a Combined Instrument Transformer” either succeeds or fails, so I never rush it.
Primary High-Voltage Connections on Combined Instrument Transformer
When I look at how to install a combined instrument transformer the right way, the primary high-voltage connections are where most costly mistakes happen. For any 11kV or 33kV combined CT-VT installation, I treat this step like working on live revenue: clean, tight, and by the book.
Bushing Identification (P1, P2) and Direction
On a combined CT-VT, the CT side follows the same polarity rules you see in any current transformer installation guide:
P1 faces the source (incoming feeder or line side).
P2 faces the load (outgoing feeder, transformer, or bus).
To keep CT polarity S1 S2 direction correct in your current transformer connection diagram:
Match P1 → S1 and P2 → S2 as shown in the OEM wiring diagram.
For metering and protection, always align the CT direction with the defined power flow in your one-line.
Mark P1/P2 clearly on the structure so nobody flips direction during maintenance.
This simple step avoids negative power readings and head-scratching later when you connect the CT outputs into meters or relays.
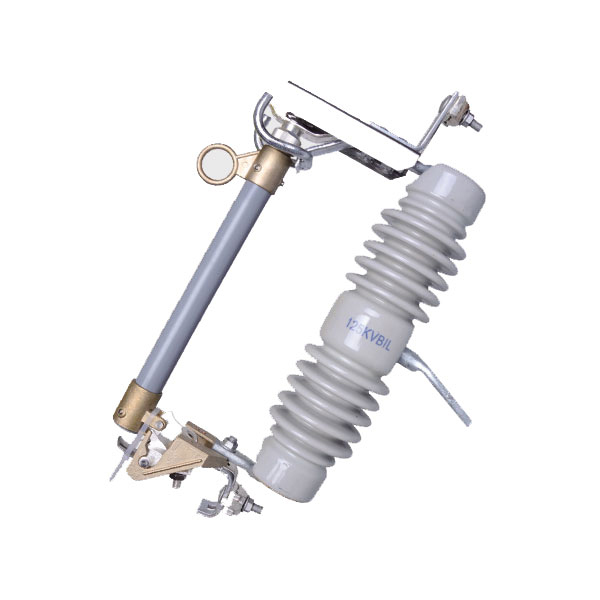
11kV and 33kV Cable Termination and Stress Cone
For 11kV and 33kV combined transformer installation, I treat the primary terminations like any critical medium-voltage joint:
Use the rated termination kit (11kV or 33kV) that matches cable size, insulation type, and shield design.
Build the stress cone exactly as per the kit instructions—no shortcuts on strip lengths, tapering, or semi-con removal.
Keep creepage paths clean and dry, especially in outdoor metering unit installation or when the CT-VT sits next to metal-clad switchgear lineups and other switchgear and protection equipment.
Always support the cable mechanically so the bushing is not taking cable weight or bending forces.
Done right, your primary termination behaves like a factory joint, not a weak point in the system.
Torque Values for Primary Bolts
Loose primary bolts are a silent failure mode on combined instrument transformer wiring:
Follow the manufacturer’s torque table for bushing palms and connector hardware—never “tight by feel.”
Use a calibrated torque wrench and tighten in a crisscross pattern so pads sit flat with full contact.
After the first energization and a few load cycles, re-check critical bolted joints during your first thermography scan.
Correct torque gives you low contact resistance and keeps those 11kV/33kV joints cool for the long haul.
Heat-Shrink vs Cold-Shrink Termination Tips
Both termination styles work if you apply them correctly; I pick based on site conditions and crew skill:
Heat-shrink terminations
Good for controlled environments with safe torch or hot-air gun use.
Watch for overheating, charring, or uneven shrinking.
Keep the surface spotless—heat-shrink will lock in any contamination.
Cold-shrink terminations
Better for confined spaces or areas where open flames are a problem.
Faster and more consistent for field crews with mixed experience.
Make sure the body is seated fully before pulling the core, or you’ll get gaps and tracking paths.
Whether I’m closing out an outdoor metering cubicle CT-VT mounting or tying into indoor gear, clean prep, correct stress cone building, and proper torque are what make the primary high-voltage connection safe and reliable.
Secondary Wiring for Combined Instrument Transformer
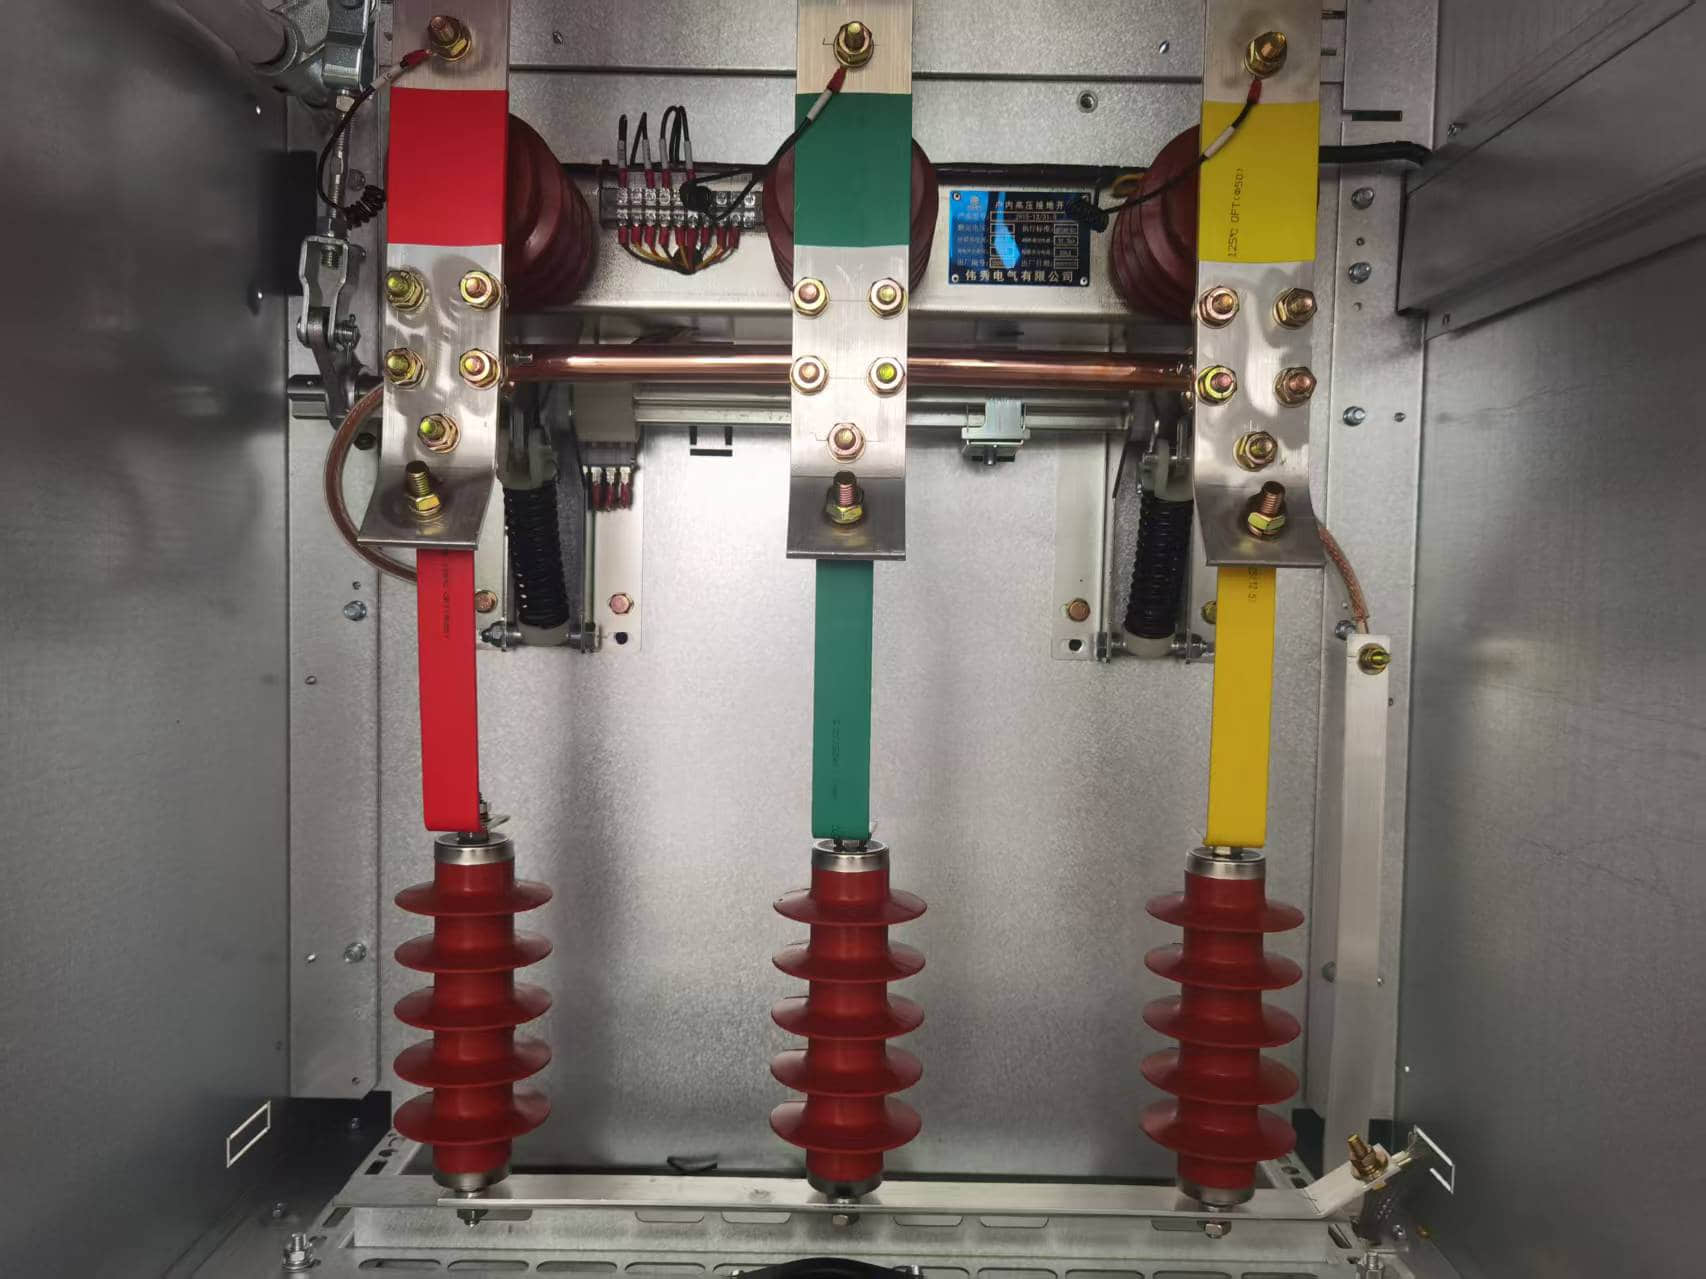
Terminal box layout and CT polarity (S1/S2)
When I design secondary wiring for a combined CT-VT, I keep the terminal box layout clean and labeled so troubleshooting is easy years later.
I group CT, VT, and auxiliary terminals separately and label each core (e.g., CT1-Metering, CT2-Protection) clearly on the cover.
Think of the terminal box as a compact, outdoor-rated cable junction box installation – tight bends, mixed voltages, and poor labeling will come back to bite you.
For CT secondaries, I always follow S1 → source/line side and S2 → load/meter side. CT polarity (S1/S2) must match the single-line diagram and the current transformer connection diagram.
On metering, S1 usually goes toward the utility / incoming side so the meter reads forward energy. A reversed CT direction will give negative or inaccurate readings.
VT terminals, residual voltage, and system configuration
Proper VT wiring is critical for accurate metering and protection in 11 kV and 33 kV systems.
VT secondary terminals are commonly marked a-n, b-n, c-n (for phase-to-neutral) or a-b, b-c, c-a (for phase-to-phase). I always match the manufacturer’s voltage transformer connection diagram.
Residual voltage or open-delta (e.g., Vab + Vbc + Vca) terminals are used for ground-fault and neutral displacement functions – keep those cores on their own terminals and clearly tagged.
For 3-phase 3-wire systems, I typically use VT secondaries in delta or open-delta depending on the relay scheme.
For 3-phase 4-wire systems, VT secondaries are usually wired in star (wye) with one neutral point brought out and earthed at a single defined point only.
Shorting links, test blocks, and cable sizing
Secondary safety and serviceability matter just as much as the primary side when we talk about how to install a combined instrument transformer.
Every CT secondary must have a reliable shorting link or test block at the terminal box or in the relay panel. I never open a CT circuit unless a shorting path is closed first.
I prefer modular test blocks for metering and protection so technicians can inject test current without disturbing permanent wiring.
For CT and VT circuits, I usually size control cables at 14–12 AWG copper for longer runs in US substations, keeping voltage drop and burden within CT and VT accuracy class limits (0.2s, 0.5s, etc.).
I always use shielded twisted-pair or multi-core control cable for CT/VT secondaries, with the cable shield earthed at one end only (typically at the relay or marshalling cabinet) to avoid ground loops.
All terminations are crimped with the proper lugs, tightened to the manufacturer’s torque spec, and given a light tug test before I sign off the current transformer installation guide or wiring diagram.

Earthing and Grounding for Combined Instrument Transformer
Proper grounding is non‑negotiable when we talk about how to install a combined instrument transformer safely on a U.S. medium‑voltage system. Done right, it keeps personnel safe, protects meters and relays, and keeps readings stable and accurate.
Tank Earthing with Two Independent Earth Points
For any combined CT‑VT installation, I always treat the metal tank as a live-adjacent surface that must be solidly bonded:
Use two separate earth connections on the tank, tied to the main substation ground grid or building ground ring.
Keep both earth leads short, straight, and sized per NEC/NESC (typically copper, with mechanical or compression lugs).
Install on opposite sides of the tank where possible for a low-impedance path and mechanical redundancy.
When combined CT‑VT units are installed near metal‑clad switchgear or vacuum circuit breakers with higher insulation requirements, bond all structures to the same ground grid to avoid dangerous potential differences.
Secondary Neutral Earthing at a Single Point
Incorrect neutral grounding is a common hidden problem in metering unit installation:
Ground the VT secondary neutral at one point only (single-point earthing), typically inside the terminal box or main control panel.
Never ground the same VT secondary again downstream at meters, relays, or marshalling panels; multiple neutral earths create circulating currents and metering errors.
Clearly label the “neutral grounding point” in the combined instrument transformer wiring diagram and on the door of the control panel.
For 11 kV and 33 kV combined CT‑VT units, verify the earthing layout against project specs and utility metering standards before energizing.
Shield Earthing of Control Cables
Control and metering cable shields are part of the earthing system and need just as much attention:
Use shielded cables for CT and VT secondaries, especially for long runs between outdoor metering cubicles and indoor panels.
Ground the cable shield at one end only (usually at the panel end) to avoid ground loops; leave the other end insulated and neatly capped.
Bond the shield to the same ground bar as the VT neutral to keep the reference point clean and noise‑free.
Keep shields and grounding conductors away from high‑current paths (like breaker feeder cables or fuse cutouts on 15 kV–35 kV lines) to minimize induced voltage; this is the same logic we apply when laying out MV feeders and fuse cutout protection hardware.
Handled this way, your combined transformer earthing requirements are fully covered: safe tank grounding, clean single-point VT neutral earthing, and properly managed cable shields that keep metering and protection rock solid.
Oil Filling and Leakage Check for Oil-Filled Combined Instrument Transformer
For any oil-filled unit in a U.S. substation, I treat oil filling and leak checks as a critical step in how to install a combined instrument transformer safely and keep it reliable for the long haul.
Vacuum filling procedure
Always use clean, filtered transformer oil that meets your project spec.
Pull a vacuum on the tank and bushings first to remove moisture and air; hold it long enough for pressure to stabilize.
Fill from the bottom under vacuum so the oil rises slowly and doesn’t trap bubbles around the CT/VT windings and insulation.
If the combined CT-VT is built into metal-clad gear such as indoor KYN28-12 MV switchgear, confirm the OEM’s max vacuum level so you don’t stress the enclosure.
Oil level and leakage check
After filling and releasing the vacuum, confirm the oil level on the sight glass or gauge at the reference temperature on the rating plate.
Let the unit sit, then re-check the level after a few hours of temperature stabilization.
Inspect all gaskets, flanges, drain plugs, and welded seams for sweating or drips; any sign of leakage must be fixed before energizing.
Breather silica gel check
Make sure the conservator breather is installed upright, with oil seal (if provided) at the correct level.
Check silica gel color: replace or regenerate if it’s turned pink or clear (moist), not deep blue/dry.
Verify the breather pipe is not blocked and can “breathe” as oil expands and contracts; a blocked breather will pull moisture into the tank or stress the seals.
Handled right, this step protects insulation life, reduces failure risk, and keeps your combined CT-VT ready for accurate metering and protection in real U.S. grid conditions.
Pre-Commissioning Tests for Combined Instrument Transformer
Before we energize any combined CT-VT, we run a tight set of pre-commissioning tests. This is the last chance to catch wiring issues or damage from transport and installation, especially on medium-voltage gear like 11 kV and 33 kV metering units or when the transformer sits inside metal-clad switchgear lineups.
Polarity test for CT and VT
Confirm CT polarity (S1 vs S2) and VT polarity (H1/X1) using a simple DC “kick” or low-voltage AC test.
Make sure the indication matches your current transformer wiring diagram and that CT arrows point toward the system side per your one-line.
This step avoids reversed energy flow, negative kWh readings, and protection mis-trips.
Ratio test by primary injection
Inject a known current on the primary and measure secondary output for each core (protection, metering).
Verify the ratio against the rating plate (for example, 200/5 A or 600/1 A) and confirm the class (0.2S, 0.5, 5P, etc.) meets your project spec.
For VTs, apply a reduced primary voltage and check that the secondary matches the nameplate ratio.
Insulation resistance (Megger) test
Measure insulation resistance between primary–secondary, primary–earth, and secondary–earth using a suitable test voltage.
Keep CT secondary circuits shorted and VT secondaries properly handled to avoid false readings and unsafe voltages.
Compare results with manufacturer limits and your utility or facility standard.
Magnetizing curve test (optional)
For critical metering or protection applications, capture the CT magnetizing curve.
Plot excitation current vs voltage to confirm knee point, saturation behavior, and core health, especially on protection cores for high fault levels.
Commissioning checklist (PDF)
We use a standard, step-by-step commissioning checklist that covers every combined instrument transformer test, signatures, and test results.
You can download our commissioning checklist (PDF) from our metal-clad switchgear resource section or request it from our team so your field crew has a clear, repeatable process for every installation.
Common Combined Instrument Transformer Installation Mistakes

When people ask me how to install a combined instrument transformer the right way, I always start with what goes wrong most often. These are the mistakes that damage equipment, ruin accuracy, and can seriously hurt someone if you’re not careful.
Wrong CT direction (P1/P2) causing negative or reverse readings
Always point the CT’s P1 toward the source and follow the CT polarity S1/S2 markings in your current transformer installation guide. A reversed CT in a combined CT-VT installation will flip power and energy direction, confuse metering, and mess up protection logic.Open VT secondary, creating a dangerous high voltage
A voltage transformer secondary must never be left open under load. An open VT secondary can build up a lethal voltage and stress the insulation, just like poor high-voltage insulator safety practices on overhead gear. Always land VT secondaries on a proper burden, test block, or terminal with shorting/grounding as per the current transformer connection diagram.Multiple neutral earth points are causing a circulating current
The VT/CT secondary neutral for each circuit should be earthed at one point only. Multiple neutral earths in a metering unit installation guide setup create circulating currents, heating, and bad readings—especially at accuracy class 0.2s or 0.5s.Loose primary bolts and connectors are causing overheating
On 11 kV or 33 kV combined transformer installations, loose primary clamps, lugs, or busbar bolts will run hot, oxidize, and eventually fail. Always clean contact surfaces, apply the specified torque, and re-check after energization as part of your combined instrument transformer testing after installation.
Maintenance Tips for an Installed Combined Instrument Transformer
Once a combined instrument transformer is in service, I treat maintenance as cheap insurance against outages and bad metering data. For most US sites, this simple routine works well:
Run periodic oil tests (BDV and DGA) – For oil-filled combined CT-VT units, I schedule basic breakdown voltage (BDV) tests annually and dissolved gas analysis (DGA) every 1–3 years, depending on criticality. BDV catches moisture and contamination early, while DGA flags internal arcing or overheating long before you see a failure. If you’re not sure what the gas patterns mean, start by reviewing how high‑voltage transformers behave internally in guides like this breakdown of how high-voltage transformers work.
Set a thermography scanning schedule – I plan infrared (IR) thermography on each combined instrument transformer at least once a year, preferably during high load. Hot spots on primary connections, terminal boxes, or bushing clamps usually point to loose hardware, undersized conductors, or overloaded circuits. For outdoor metering units, IR scanning is one of the fastest ways to catch problems that won’t show up in a simple visual check or current transformer wiring diagram.
Re-check torque on critical connections – After the first few months in service, I re-torque all accessible primary and secondary bolted joints on the combined CT-VT (following the OEM torque values). Then I repeat this every few years or after any major fault event. Focus on:
Primary terminations and bushing connectors
Grounding/earthing connections on the tank and structure
Secondary terminal blocks, shorting links, and test blocks
Always de-energize, lock out, and follow your site’s safety rules before touching connections. A consistent maintenance routine like this keeps your combined instrument transformer accurate, safe, and reliable for the long haul.
FAQ: How to Install a Combined Instrument Transformer
What are S1 and S2 in a current transformer?
S1 is the “positive” or source side of the CT secondary, and S2 is the “negative” or return side. When you follow any current transformer wiring diagram, always run S1 toward the relay or meter’s current input (often labeled k or +) and S2 toward the return (l or –) so the measured current direction matches the system’s real power flow.
Which side is P1 and P2 in a combined transformer?
P1 is the side facing the incoming line (source), and P2 faces the outgoing side (load). For correct CT polarity and metering accuracy, point the CT arrow or P1 marking toward the utility/source side of the circuit. This CT installation direction rule applies to both standalone CTs and combined CT-VT units.
Can we install a combined transformer indoors?
Yes, as long as the enclosure rating, clearances, and ventilation match the nameplate data and local code (NEC/NESC). Most combined CT-VT units in U.S. utilities are outdoor-rated for pole or yard use near power pole transformers, but you can mount them indoors in a metal-enclosed cubicle if the manufacturer allows it and your AHJ approves.
How do I test the polarity of a combined CT-VT?
Use a simple “bump” or DC pulse test on the primary side and watch the deflection on a DC voltmeter connected S1–S2 (for CT) or to the VT secondary terminals. A forward bump on P1 should give a positive swing on S1 (and the marked VT secondary terminal). If the meter swings negative, the polarity is reversed.
What happens if a CT secondary is left open?
An open-circuit CT secondary is dangerous. With primary current flowing, the CT will drive its secondary to a very high voltage, which can shock personnel, damage insulation, and ruin the CT. In any current transformer installation guide, you’ll see the same rule: never open a CT secondary under load—keep it connected to its burden or safely shorted through a shorting link or test block.