
Author: Thor
Senior Electrical Engineer, with 12 years of experience in high and low voltage switchgear installation, commissioning, and overseas project technical support. Currently, Thor is the Technical Department Manager at Weisho Electric Co., Ltd.
Every step is crucial when installing high and low voltage switchgear. From initial unboxing and inspection upon arrival to final commissioning and operation, overlooking any detail can lead to equipment failure or even severe safety hazards.
This is particularly challenging for electrical engineers working on complex international projects. They often face diverse installation standards, environmental variations, and unique localization requirements across different countries and regions.
This guide provides a complete breakdown of the standardized process for high and low voltage switchgear installation. We'll detail every key step, from initial preparation to final checks.
Furthermore, we'll explore unique considerations and specific nuances for projects in Europe, the Americas, the Middle East, and "Belt and Road" countries. This comprehensive resource offers genuinely practical, professionally deep, and operationally insightful guidance, helping ensure the safe, efficient, and stable operation of your power distribution equipment.
I. Initial Preparation: Inspection & Foundation Verification

Thorough inspection and comprehensive foundation checks are critical before installing high and low voltage switchgear. Neglecting this stage can result in significant rework and increased costs later on.
1. Equipment Unboxing & Inspection
Unboxing and inspecting the equipment is the first step to ensure it matches your order. It also confirms that no damage occurred during transit.
Specification Verification Tips:
Beyond cross-referencing models against drawings, you should primarily check the cabinet's "rated parameters." For high-voltage switchgear, confirm the rated voltage and short-circuit breaking current.
Low-voltage switchgear requires verification of rated current and the number of outgoing circuits.
Important Tip: Our clients are worldwide, including Europe and the Middle East, so always verify that parameters meet local standards. For example, switchgear exported to Europe must comply with EN 62271, with short-circuit breaking currents typically ≥31.5kA.
If any discrepancies are found, contact the factory immediately for returns or exchanges.
Key Points for Exterior Inspection:
Use a 2-meter straightedge against the cabinet side to check for deformation. A maximum error of ≤3mm is allowed.
Cabinet door seals must be intact and undamaged. For hot regions like the Middle East, also check the seal's temperature resistance; it needs to be ≥80°C.
After closing, test with a piece of paper; if the paper can't be pulled out, the seal is good. This effectively prevents sand and dust ingress.
Internal Component Check:
Once the cabinet door is open, verify that core components like circuit breakers and current transformers match the bill of materials. For instance, European standard high-voltage switchgear often includes ABB or Schneider circuit breakers.
Gently wiggle terminal blocks by hand to ensure no significant looseness. This prevents issues that could occur during transport.
Additionally, verify that "CE certification" and "UL certification" marks are present. These are mandatory for American and European clients.
2. Foundation Condition Confirmation
The installation environment for the switchgear's foundation is crucial. It directly impacts equipment stability and operational safety.
Foundation Channel Steel Pre-treatment:
Before installation, use a level to check for levelness at three points on the channel steel: "both ends" and the "middle." If the error exceeds 1mm/m, grind it with a grinding wheel or use shims to adjust it.
Never use non-conductive materials like wood or plastic for leveling. For some humid and hot regions along the "Belt and Road," the channel steel requires "hot-dip galvanizing" (with a thickness of ≥80μm) to enhance corrosion resistance.
Detailed Environmental Requirements:
High-voltage switchgear installation areas need to reserve a "maintenance aisle." European and American clients typically require at least ≥1.8m in front, which is stricter than many domestic standards.
If installing in Middle Eastern desert areas, add a dust cover to the top of the cabinet. This prevents sand accumulation from affecting heat dissipation. You should also apply two coats of weather-resistant anti-rust paint to the bottom of the channel steel.

II. Cabinet Placement: Precise Positioning & Overall Leveling
Cabinet placement is the core physical step in the installation process. It demands precision and stability for reliable wiring and operation.
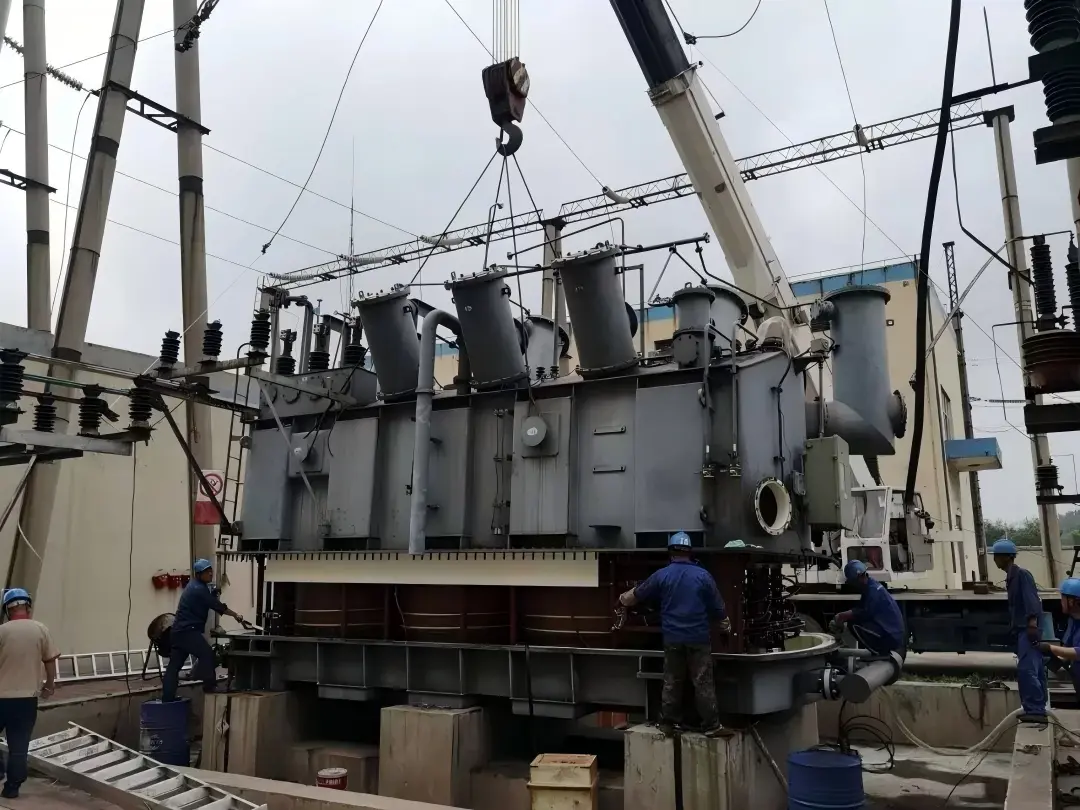
1. Cabinet Handling & Positioning
Safe handling and accurate positioning are vital. These steps ensure the equipment remains undamaged.
Handling Safety Guidelines:
Cabinets weighing over 400kg require a forklift for transportation. Place rubber pads on the forklift arms to prevent scratching the cabinet.
Ensure the cabinet's tilt angle is ≤15° to prevent internal components from dislodging. For projects exported to Europe and the Americas, pay close attention to the "center of gravity markings" on the cabinet during handling. These are typically applied according to ANSI standards to prevent tipping.
Numbering & Positioning Tips:
Number the cabinets in sequence, either "from left to right" or "from incoming to outgoing." For example, this could be: incoming cabinet → metering cabinet → outgoing cabinet.
Mark the cabinet edge positions on the floor with chalk. For overseas EPC projects, like substations along the "Belt and Road," cross-reference English installation drawings with local construction teams to prevent communication errors. This ensures placement deviation is ≤5mm.
2. Fastening & Adjustment
Precise fastening and leveling are fundamental. They ensure the long-term stable operation of switchgear.
Shim Usage Guidelines:
Use no more than three shims at each location to avoid excessive stacking, which can lead to loosening. Shims must also fit tightly against the cabinet bottom and channel steel; there should be no hollow sound when tapped.
For earthquake-prone regions, like parts of the Middle East, shims must be spot-welded for enhanced seismic resistance. After welding, paint them the same color as the cabinet to ensure a uniform appearance, meeting European and American clients' attention to detail.

III. Busbar Connection: The Core of Electrical Safety
The quality of busbar connections directly impacts the switchgear's conductivity and operational safety. This makes it one of the most critical installation steps.
1. Busbar Preparation & Connection
Different busbar materials have unique preparation requirements. You must strictly follow these guidelines for good conductivity.
Different Busbar Material Treatment:
Cabinets exported to Europe often use copper busbars for superior conductivity. Before connecting, polish the contact surfaces with 0-grade sandpaper until they have a "mirror finish."
After removing oxidation, apply "European standard power compound grease" (such as the Klüber brand), which is compliant with EN 50165.
Some Middle Eastern projects use aluminum busbars due to their lower cost. You must first apply an "aluminum-specific anti-oxidation agent."
Then, use copper-aluminum transition joints to connect them, preventing electrochemical corrosion. The joints also need insulating heat-shrink tubing with a temperature resistance of ≥125°C to withstand high temperatures.
Bolt Connection Standards:
Use "stainless steel bolts" that match the connection holes. These are crucial for coastal clients to resist salt spray corrosion.
Tighten bolts in a "diagonal sequence." For example, for an M12 bolt, tighten the top-left, then bottom-right, then top-right, then bottom-left.
Important Note: European and American clients often require a "torque test report." You must use a torque wrench with data logging capabilities, such as the Hazet or Stahlwille brands, and save the tightening data. The standard torque for an M12 bolt is 45N·m ±5%.
2. Insulation Protection
Reliable busbar insulation is essential. It's a critical safeguard against short-circuit faults.
Busbar support insulators must be tested with a 2500V megohmmeter. An insulation resistance of ≥1000MΩ is considered compliant.
For European and American clients, an additional "UL94 V0-rated insulation material certification report" is required.
During installation, the insulator base must be padded with an insulating mat. This mat should be at least ≥3mm thick, made of epoxy resin, and compliant with IEC 60893.

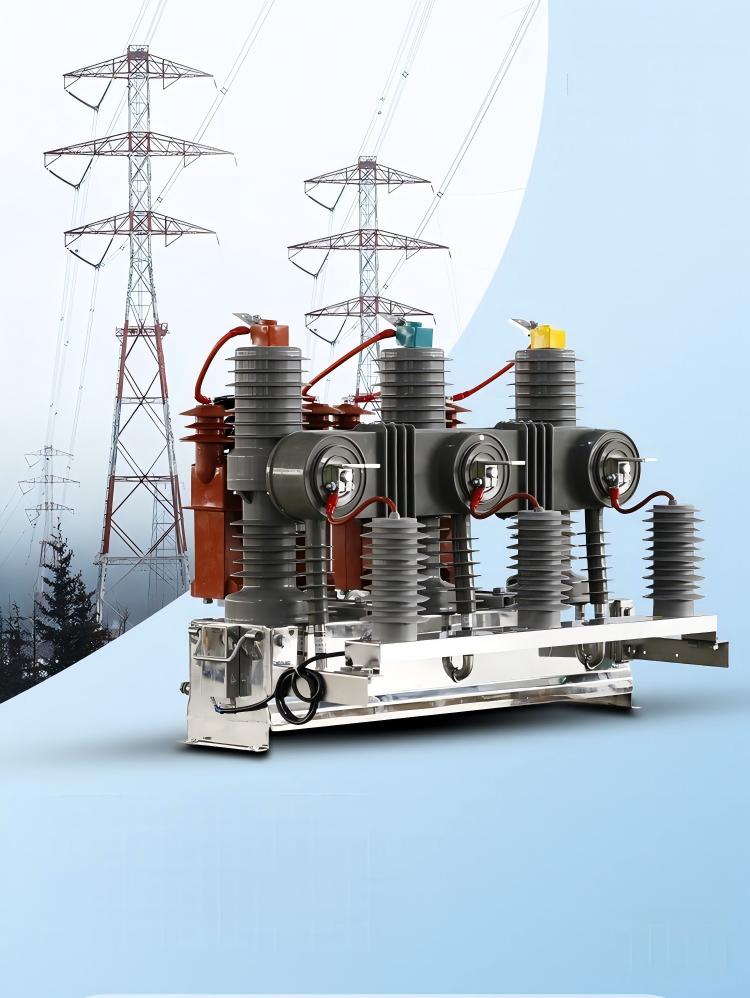
IV. Dedicated Installation for Withdrawable High-Voltage Switchgear
Installing withdrawable high-voltage switchgear involves specialized mechanical and electrical interlocking commissioning. It requires meticulous operation.
1. Contact & Interlock Commissioning
Precise contact alignment and reliable interlocking are fundamental. They are the bedrock for the safe operation of withdrawable high-voltage switchgear.
Contact Alignment Technique:
Push the trolley to the "test position." Use a flashlight to illuminate the stationary contact and observe if the moving contact is centered.
Cabinets exported to Europe and the Americas require a deviation of ≤0.5mm, which is stricter than many domestic standards.
If it's biased to one side, adjust the "adjustment bolts" at the bottom of the trolley. Turn clockwise for left, counter-clockwise for right.
After each adjustment, re-insert the trolley and check again. Use a feeler gauge to measure the gap, which needs to be ≤0.2mm.
Interlock Testing Method:
For mechanical interlocks: Attempt to pull out the trolley while it's in the "closed position." If it can be pulled out, it's non-compliant.
For Middle Eastern clients, additionally test "anti-misoperation interlocks," complying with IEC 61936.
For electrical interlocks, disconnect the cabinet door limit switch; the trolley should then be unable to close. Use a multimeter to measure the closing coil voltage (no voltage indicates compliance), and record the test data for European and American clients.
2. Grounding & Cable Securing
Grounding for withdrawable high-voltage switchgear must be solid and reliable. Cable securing prevents accidental loosening.
The trolley's grounding contact must be connected with a "yellow-green dual-color grounding wire," with a cross-sectional area of ≥6mm². This is compliant with European and American standards.
After connection, test with a ground resistance tester. It needs to be ≤0.5Ω for compliance.
For European clients, a "grounding continuity test report" is required, as per EN 61439 standards.

V. Final Checks & Common Issues FAQ
Upon installation completion, comprehensive final checks and the ability to anticipate and resolve common issues are paramount. These are the ultimate guarantees of project delivery quality.
Final Checks
Labeling:
In addition to Chinese labels, simultaneously affix English labels, such as "G1-10kV Incoming Cabinet Rated Current 630A."
For Middle Eastern clients, add Arabic labels. Always paste an "English internal wiring diagram" on the inside of the cabinet door for easy maintenance by local electricians.
Export Compliance Check:
If it's an export product, verify that the "nameplate information" is complete. This includes model, parameters, CE/UL markings, and manufacturer information.
Check that the packaging complies with ISTA 3A shipping standards. This helps prevent damage during transit.
FAQ (Frequently Asked Questions & Solutions)
Q: For cabinets exported to Europe, the busbar connection temperature rise exceeds 50K (European standard requires ≤45K). How should we handle this?
A: First, verify if a European standard power compound grease was used. Domestic products might be incompatible, so we recommend switching to compliant brands like Klüber.
Second, check if the bolt torque meets the standard. Re-tighten using a torque wrench with data logging to ensure it reaches 45N·m.
Finally, check if the busbar cross-section meets EN 60287 current carrying capacity requirements. Replace with a larger cross-section copper busbar if necessary.
Q: A Middle Eastern client reported that the trolley wouldn't push in, and the local construction team couldn't understand the Chinese drawings. How can we quickly resolve this?
A: First, send an "English installation video" via WhatsApp, which Weisho Electric can provide. This will guide them in clearing any debris from the rails.
If the problem persists, call our technical hotline at +86-0577-62788197 for remote video guidance, as we support English communication. In urgent situations, we can coordinate with our local service partners, as Weisho has five service points in the Middle East.
Q: In a "Belt and Road" project, the cabinet leaked water after heavy rain. What should we do?
A: First, inspect the sealing strips for damage and replace them with weather-resistant sealing strips promptly; Weisho can expedite replacements. Second, adjust the cabinet door hinges using a wrench to ensure the cabinet door fits tightly against the cabinet body.
Lastly, as an added solution for rainy regions, install waterproof rubber strips on the inside of the cabinet door.

VI. Call to Action
As engineers at Weisho Electric, we understand the challenges of overseas projects. These include differing standards, communication hurdles, and localization needs. If you require support, please feel free to contact us through the following methods:
Obtain Customized Resources: Email [email protected] with your "project type + region." You'll receive a free copy of our "Switchgear Installation Standard Manual," which includes localized considerations.
Technical Support: Call +86-0577-62788197 or use WhatsApp (+86 159 5777 0984) for real-time communication. Our support covers all global time zones.
Customized Services: For large overseas projects, you can schedule "on-site installation guidance." Just send your request to the email address to receive a tailored proposal.
Weisho Electric not only provides internationally compliant switchgear but also offers comprehensive installation support. Whether you're in Europe, the Americas, the Middle East, or along the "Belt and Road," we're committed to ensuring your equipment operates safely and reliably. Choose Weisho and make your cross-border power distribution projects hassle-free.