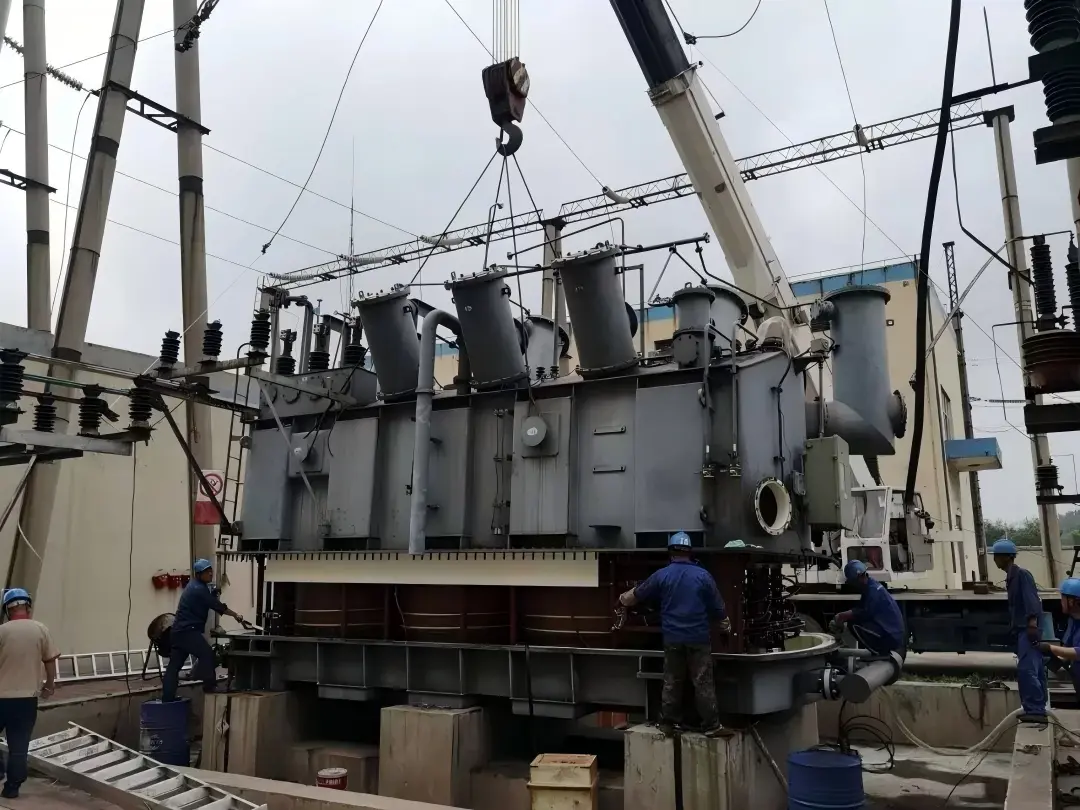
Why Sudden Transformer Short-Circuit Damage Is So Dangerous
A sudden short-circuit fault in a power transformer is one of the most destructive events it can experience. The visible fault may clear in seconds, but the internal mechanical and insulation damage can remain hidden and permanent.
That is why professional diagnosis cannot rely on one test alone. In real maintenance practice, the root cause must be confirmed through a structured path of oil and gas evidence, electrical testing, and internal teardown inspection.
The core issue is simple: at the instant of short circuit, massive electromagnetic force can irreversibly deform windings, shift clamping parts, and damage the core support structure. This article explains the short-circuit force mechanism, the complete post-fault inspection process, the repair standards, and the common pitfalls that lead to repeat failures.
What Happens to a Transformer During a Sudden Short-Circuit Fault?
During a severe external or internal fault, transformer current can rise to many times the rated current. The resulting electrodynamic force rises extremely fast and acts directly on the winding conductors and support structure.
This is why transformer short-circuit damage diagnosis must focus not only on electrical insulation condition, but also on hidden mechanical distortion.
How Short-Circuit Current Creates Electromagnetic Force in Transformer Windings
The fundamental principle is that electrodynamic force is proportional to the square of current. If the fault current doubles, the force does not merely double; it rises by roughly four times.
In practical transformer engineering, these forces are mainly divided into radial force and axial force. Both can cause severe internal displacement even when no external damage is visible.
Radial Force Damage: Why Low-Voltage Windings Often Deform First
Under short-circuit conditions, the high-voltage winding is typically subjected to outward tensile stress, while the low-voltage winding is subjected to inward compressive stress. This makes the low-voltage winding more vulnerable to buckling, ovality, and radial collapse.
Field experience consistently shows that low-voltage windings are among the first components to suffer permanent deformation, especially in compact or older transformer designs.
Axial Force Damage: How Windings Shift and Compress Along the Core
Axial force acts along the height of the winding. It can compress the coil stack, shift high-voltage and low-voltage windings relative to each other, and transfer impact force into the core yoke, clamping plates, tie rods, and through-bolt structures.
When axial displacement is large, the transformer may later show abnormal capacitance, changed impedance behavior, insulation abrasion, or lead displacement.
Which Transformer Parts Usually Fail First After a Short Circuit?
From a maintenance priority standpoint, the most likely damage zones are not equal. Inspection should follow the components with the highest practical failure probability first.
Priority: low-voltage winding and balancing winding
Second priority: high-voltage and medium-voltage windings
Third priority: core, clamps, press plates, through-bolts, grounding links
This ranking reflects actual short-circuit force transfer behavior observed in workshop teardown and post-fault failure analysis.

How to Diagnose Transformer Short-Circuit Damage Step by Step
A disciplined sequence improves accuracy and reduces unnecessary dismantling. It also helps engineers distinguish between a survivable short-circuit event and a transformer requiring major repair or rewind.
Recommended Post-Fault Inspection Sequence
The best-practice sequence is:
Gas and oil analysis
Electrical testing
Lifting the tank cover or internal teardown inspection
This order matters. Oil and gas evidence may indicate arcing or insulation decomposition before the transformer is opened, while electrical tests help identify the most likely internal damage zone before teardown.
Fast Triage Checklist After a Transformer Short-Circuit Event
| OBSERVED SYMPTOM | LIKELY DAMAGED PART | RECOMMENDED TEST | URGENCY LEVEL |
|---|---|---|---|
| Gas relay alarm with light gas accumulation | Insulation paper, winding hot spot, minor discharge area | Gas relay sampling, DGA, insulation tests | High |
| Sudden rise in DC resistance imbalance | Winding strands, joints, tap lead connection | DC resistance comparison with historical records | Critical |
| Abnormal winding capacitance deviation | Deformed winding, axial displacement, S-bend distortion | Capacitance and comparison testing | Critical |
| Metallic noise after fault | Core clamp, shifted spacers, loose internal parts | Internal inspection, clamp check | High |
| Burnt oil odor or darkened sample | Severe overheating or arcing zone | Oil sampling, DGA, acidity and dielectric testing | Critical |
| Repeated abnormal insulation readings | Moisture ingress, insulation displacement, internal damage | Insulation resistance, dielectric response, teardown review | Critical |
Transformer Winding Damage Diagnosis After a Fault
Windings are the most failure-prone parts after a short circuit. For that reason, they must be the first internal component group to receive focused testing.
If you need to know how to test transformer windings after a fault, the answer is not one method but a combination of resistance, capacitance, historical comparison, and visual confirmation.
DC Resistance Test for Transformer Windings After Short Circuit
The DC resistance test is one of the most practical first-line tools in post-fault transformer electrical testing. It helps detect broken strands, poor brazed joints, contact deterioration, or displaced lead connections.
The most valuable interpretation comes from comparing:
Phase-to-phase values
Tap-to-tap consistency
Current results versus factory records
Current results versus previous maintenance history
In many utility specifications, a phase imbalance that materially exceeds historical deviation is treated as a strong sign of internal winding or lead damage, especially when supported by fault history.
DC Resistance Interpretation Guide
| TEST PATTERN | LIKELY DEFECT | SEVERITY | NEXT ACTION |
|---|---|---|---|
| All phases stable and close to historical data | No obvious conductor discontinuity | Low | Continue with capacitance and insulation checks |
| One phase higher than others by abnormal margin | Loose joint, broken strand, lead damage | High | Repeat test, verify tap position, prepare internal inspection |
| Tap changer related resistance irregularity | Contact wear or transition connection issue | Medium to High | Inspect tap leads and switching contacts |
| Sudden deviation versus previous records after fault | Mechanical movement or conductor damage due to short circuit | Critical | Open transformer for winding inspection |
| Unstable readings during repeated measurement | Intermittent contact, damaged joint, test setup issue | Medium to Critical | Reconfirm test and inspect internal connection points |
Winding Capacitance Test to Detect Deformation
Capacitance testing is extremely useful for detecting geometry changes that are not visible from outside the tank. When a winding deforms, the spacing between turns, discs, or between windings and grounded parts changes, and capacitance values shift accordingly.
This makes capacitance comparison a practical method for identifying S-shaped bending, radial buckling, and axial displacement. In the field, it is often used together with frequency-response methods where available, but even basic capacitance comparison can reveal hidden deformation.
Internal Teardown Inspection of Windings
When test data indicates likely deformation, the tank must be opened and the active part inspected. This step confirms whether the abnormal values reflect true mechanical damage or only measurement uncertainty.
Typical visible signs include:
Copper or aluminum melt residue
Insulation paper debris
Shifted spacers
Moved pressboards
Displaced clamping nails or pins
Flattened, bulged, or warped winding sections
Lead abrasion marks
These signs are decisive in repairing transformer mechanical deformation correctly, because they identify not just that damage occurred, but where the force concentrated.

Real-World Example: Winding Deformation Found After Fault Current Event
In one 35 kV, 20 MVA transformer maintenance case, a feeder short-circuit event was followed by a Buchholz alarm and abnormal phase resistance on the low-voltage side. Historical DC resistance deviation had remained within 0.4%, but after the fault, one phase shifted by 3.1% from the baseline.
Capacitance comparison then showed a 6.8% deviation on the same winding section. After tank opening, technicians found displaced spacers, paper fragments, and a visible local S-bend in the low-voltage winding.
| PARAMETER | BEFORE FAULT | AFTER FAULT | INTERPRETATION |
|---|---|---|---|
| LV phase resistance imbalance | 0.4% | 3.1% | Strong indication of conductor or contact disturbance |
| Winding capacitance deviation | Within routine baseline | 6.8% | Likely mechanical displacement |
| Visual findings | Normal | Spacer movement, paper debris, S-bend | Mechanical short-circuit damage confirmed |
How to Check Transformer Core and Clamping Structure for Mechanical Damage
Short-circuit force does not stop at the windings. Once the coil structure moves, the impact can transfer into the iron core and all major compression members.
Ignoring this stage is a common reason for repeat faults after otherwise acceptable winding repair.
Inspecting Core Yoke Lamination Displacement
The core yoke laminations should be checked for shifting, telescoping, edge displacement, and compression irregularity. Any obvious movement indicates that short-circuit force passed beyond the winding into the core support path.
Even slight yoke displacement can later create vibration, localized heating, or grounding risk if reassembly quality is poor.
Checking Core Through-Bolt Insulation and Tie Plate Integrity
Core through-bolts and tie plates should be inspected for bent hardware, cracked insulation sleeves, compression damage, and broken connectors. If through-bolt insulation fails, stray current paths may develop and lead to overheating.
This is especially important after high-magnitude through-faults, where axial force can load the clamping members far beyond normal operating stress.
Examining Press Plates and Grounding Straps for Breakage or Burn Damage
Press plates, grounding straps, and connecting tabs can show torn metal, burn marks, or elongated holes after a violent fault event. These symptoms support the conclusion that the transformer experienced serious internal movement rather than only electrical stress.
Burned contact areas can also indicate secondary arcing after mechanical displacement.
Table: Core and Clamp Damage Indicators
| COMPONENT | VISIBLE SYMPTOM | LIKELY CAUSE | REPAIR DECISION |
|---|---|---|---|
| Core yoke laminations | Layer shifting, edge misalignment | Axial force transfer from winding impact | Realign and inspect for insulation damage |
| Through-bolt insulation | Cracks, chafing, carbonization | Compression stress or grounding path formation | Replace insulation and verify core grounding |
| Tie plates | Bending, fracture, looseness | Mechanical shock during fault | Replace and restore clamping force |
| Press plates | Displacement, burn marks, deformation | Winding movement and force concentration | Repair or replace, then recheck coil compression |
| Grounding straps | Torn link, overheated joint | Mechanical pull or abnormal current path | Replace and perform grounding continuity test |
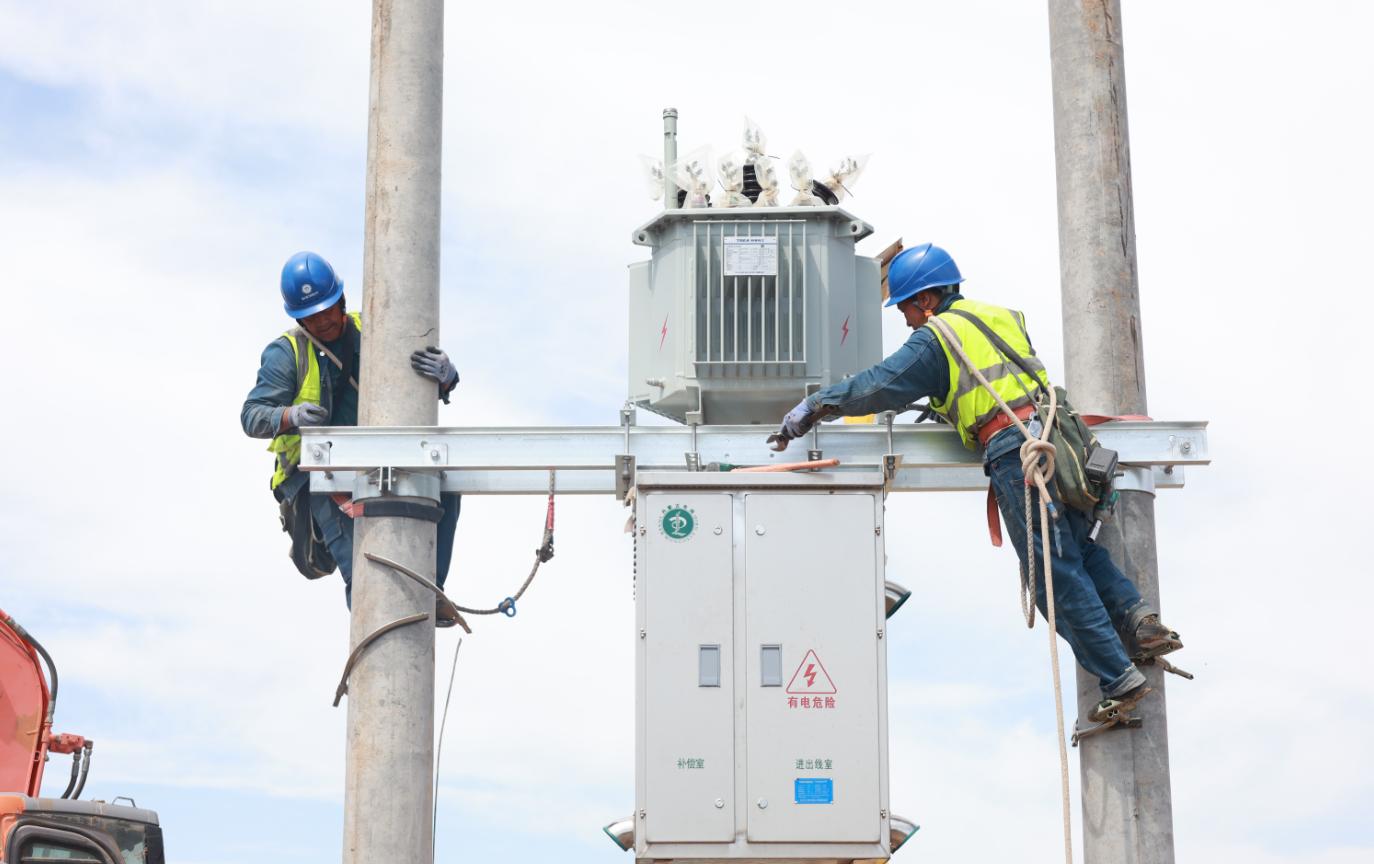
Oil and Gas Analysis to Judge Fault Type and Severity
Oil and gas analysis is indispensable in transformer insulation failure after short circuit assessment. It helps determine whether the event caused mechanical movement only, overheating, arcing, cellulose decomposition, or a combination of all four.
Gas Relay Accumulation Check After Short Circuit
If gas has accumulated in the Buchholz relay or gas relay, it should be sampled promptly and carefully. Gas collected immediately after the event can provide early evidence of internal discharge, paper decomposition, or localized oil cracking.
This evidence is especially valuable before the tank is opened, because it preserves the condition closest to the actual fault moment.
Transformer Oil Sampling and Laboratory Analysis
Oil sampling should follow contamination-controlled procedures. Samples must be taken in clean containers, with correct flushing practice, and preferably before unnecessary handling changes the internal condition.
Laboratory dissolved gas analysis can then evaluate hydrogen, methane, ethane, ethylene, acetylene, carbon monoxide, and carbon dioxide trends. The gas pattern helps classify the fault as discharge, overheating, insulation decomposition, or mixed damage.
Oil and Gas Result Patterns for Post-Fault Assessment
| GAS PATTERN | LIKELY FAULT MECHANISM | SEVERITY INDICATION | RECOMMENDED FOLLOW-UP |
|---|---|---|---|
| Hydrogen increase with low hydrocarbons | Low-energy discharge or partial discharge | Moderate | Electrical testing and close trend review |
| Ethylene and methane rise | Oil overheating | Moderate to High | Inspect hot spots and conductor contact points |
| Acetylene present | Arcing or severe discharge | Critical | Immediate internal inspection recommended |
| CO and CO2 increase with fault gases | Cellulose insulation decomposition | High | Assess paper damage and winding insulation condition |
| Mixed combustible gas surge after short-circuit event | Mechanical displacement with discharge and overheating | Critical | Full diagnosis: DGA, electrical tests, teardown |
Real-World Example: Oil-Gas Data Confirmed Internal Short-Circuit Damage
In one 110 kV transformer event, DGA performed within hours of a system short circuit showed hydrogen rising from 85 ppm to 410 ppm, acetylene from non-detectable to 18 ppm, and carbon monoxide increasing by more than 2.5 times the previous maintenance baseline.
Subsequent teardown found displaced winding blocks, insulation paper debris, and carbonized marks near a lead support. The oil-gas evidence correctly predicted a mixed fault of mechanical displacement plus local discharge damage.
How to Repair Transformer Mechanical and Insulation Damage Correctly
Proper repair is not simply replacing damaged parts. It requires restoring mechanical strength, insulation reliability, dryness, grounding correctness, and internal geometry.
A transformer can pass a limited test and still fail again if repair workmanship is weak.
Insulation Replacement Standards After a Short-Circuit Fault
All replacement insulation components should be performance-tested before installation. This includes pressboard, paper cylinders, spacers, blocks, and lead support parts.
Wooden lead support frames should receive hot-oil pretreatment before assembly. This improves oil impregnation stability and reduces later moisture-related dielectric weakness.
When to Perform Insulation Tests After Oil Filling
After oil filling, the transformer should generally remain at rest for 24 hours before insulation testing. This allows oil to fully penetrate the insulation structure and lets trapped air and moisture distribution stabilize.
Testing too early can produce misleading results and may conceal real weaknesses or create unnecessary rework.
Real-World Case: 110 kV Transformer Failure Caused by Premature Insulation Testing
In a documented 110 kV maintenance case, insulation testing was performed only several hours after oil filling. The readings appeared unstable but were initially interpreted as minor variability.
After energization preparation, repeated testing showed deterioration. The unit had to be reopened, and moisture imbalance plus incomplete oil penetration were confirmed in replacement insulation parts. The rework caused delay, extra oil handling, and avoidable cost.
Core Reassembly Mistakes That Can Cause Multi-Point Grounding
During reassembly, sharp core lamination edges can easily damage nearby insulation and create unintended multi-point grounding. This is a serious hidden defect and can lead to local overheating, abnormal core loss, and future failure.
Oil-duct insulation and all core contact clearances must therefore be checked carefully before final closure.
Real-World Case: 220 kV Transformer Fault Linked to Core Reassembly Error
In one 220 kV overhaul case, a transformer developed abnormal core grounding current after return to service. Investigation found that a lamination edge had damaged insulation in the reassembled core region, creating an unintended secondary grounding point.
The transformer had to be de-energized, reopened, and corrected. The case illustrates why core reassembly quality is as important as winding repair itself.
How to Improve Transformer Short-Circuit Strength During Repair
Whenever winding replacement or major repair is required, short-circuit withstand capability should be upgraded if feasible. This is one of the most effective ways to reduce repeat damage.
Use semi-hard copper conductor where design permits
Consider self-bonding transposed conductors
Strengthen spacer locking and axial compression structure
Improve end support and clamping rigidity
Review conductor transposition and coil support arrangement
Manufacturer Selection Advice for Better Short-Circuit Withstand Capability
Before procurement, rewind approval, or major refurbishment, review the manufacturer’s short-circuit design records and mechanical reinforcement methods. Not all transformers with similar ratings have equal short-circuit withstand strength.
Key review points include:
Short-circuit withstand design basis
Winding conductor material and hardness
Clamping structure design
Disc or layer support method
Factory test records and service history
Moisture Control and Drying Methods During Transformer Repair
Moisture control is essential throughout maintenance. Even if the original fault was mechanical, poor moisture control can create a new insulation problem.
Two practical methods are widely used:
Daily vacuum dehydration during extended maintenance
Hot-oil spray drying for 7 to 10 days after completion, depending on size and condition
These controls are particularly important when internal parts remain exposed for multiple days.
Table: Transformer Repair Standards and Common Pitfalls
| REPAIR STEP | REQUIRED STANDARD | COMMON MISTAKE | CONSEQUENCE |
|---|---|---|---|
| Insulation replacement | Use tested, qualified materials | Reusing unverified parts | Reduced dielectric reliability |
| Lead support installation | Hot-oil pretreatment for wooden structures | Installing untreated supports | Moisture retention and insulation weakness |
| Post-oil-fill testing | Wait 24 hours before insulation test | Testing too early | False readings and rework risk |
| Core reassembly | Protect insulation from sharp lamination edges | Poor handling causing multi-point grounding | Core heating and repeat outage |
| Drying control | Vacuum dehydration plus hot-oil drying when needed | Ignoring moisture during long repair | Long-term insulation degradation |
| Final decision on winding | Use multi-test confirmation | Relying on one abnormal result only | Under-repair or unnecessary rewind |
How to Decide Whether to Repair or Replace a Damaged Transformer Winding
Not every winding can be safely corrected by local repair. If deformation is severe, insulation has collapsed, or conductors are broken, full replacement is often the only reliable option.
This decision must be based on combined evidence, not assumption.
Cross-Checking Electrical, Oil, and Visual Data Before Final Repair Decision
The correct approach is to compare all available evidence together:
DGA and gas relay findings
DC resistance trend
Capacitance deviation
Insulation test results
Direct visual findings after opening
If multiple methods point to the same damage zone, the repair decision becomes much more reliable. This is a core rule in transformer short-circuit damage diagnosis.
Full Winding Replacement Precautions
When full winding replacement is required, strict controls are needed over conductor selection, insulation compatibility, drying, assembly pressure, dimensional tolerance, and final acceptance testing.
Confirm conductor mechanical strength
Match insulation class and oil compatibility
Control winding compression during assembly
Verify lead routing and clearances
Complete full drying and impregnation cycle
Perform final electrical comparison against design and baseline data
Post-Fault Transformer Testing Checklist Before Returning to Service
Before energization, the transformer should pass a structured acceptance process. This should cover both electrical performance and internal assembly correctness.
Table: Recommended Post-Fault Transformer Electrical Testing Plan
| TEST ITEM | PURPOSE | ACCEPTABLE COMPARISON BASIS | PASS/FAIL CONCERN |
|---|---|---|---|
| DC resistance | Check conductor continuity and contact integrity | Factory and historical records | Abnormal imbalance or deviation |
| Insulation resistance | Assess overall insulation condition | Previous corrected values and standards | Low value or unstable trend |
| Winding capacitance | Detect geometry change or displacement | Phase comparison and baseline data | Unexpected deviation |
| DGA / oil test | Confirm no active internal fault products | Pre-energization oil quality target | New fault gas generation |
| Turns ratio test | Verify winding connection correctness | Nameplate and factory data | Mismatched ratio or tap error |
| Core grounding check | Prevent multi-point grounding | Specified grounding condition | Unexpected extra grounding path |
Final Internal Inspection Points Before Tank Sealing
Before sealing the tank, the internal assembly should be checked point by point.
Spacer position and tightness
Clamping pressure consistency
Winding-to-winding and winding-to-core clearances
Lead routing and abrasion protection
Grounding strap integrity
Core insulation protection
Debris removal and foreign object inspection
Common Mistakes When Diagnosing Transformer Short-Circuit Damage
Many repeat failures do not come from the original short circuit alone. They come from incomplete diagnosis or poor repair control.
Relying Only on One Test Result
A single abnormal or normal result is never enough for major judgment. One test can miss mechanical deformation, insulation degradation, or developing grounding defects.
Skipping Internal Inspection After Abnormal Electrical Results
If DC resistance, capacitance, or DGA suggests internal damage, opening the transformer may be necessary. Skipping teardown can allow severe hidden deformation to remain in service.
Reusing Untested Insulation Parts
Reused or unqualified insulation can undermine the entire repair. Even if the short-circuit damage is corrected, poor insulation materials can cause premature dielectric failure later.
Ignoring Moisture During Extended Maintenance
Transformers exposed during long repairs can absorb moisture quickly. If drying control is neglected, insulation reliability may drop sharply even after successful mechanical correction.
Real-World Data Summary: Typical Transformer Damage Patterns After Sudden Short Circuit
Field evidence repeatedly shows that low-voltage winding deformation, insulation displacement, and clamp damage are the most frequent post-fault findings. Oil-gas evidence often supports these conclusions before the transformer is opened.
Table: Example Post-Fault Damage Cases and Findings
| TRANSFORMER RATING | FAULT SYMPTOM | KEY TEST DATA | TEARDOWN FINDING | REPAIR OUTCOME |
|---|---|---|---|---|
| 35 kV / 20 MVA | Buchholz alarm after feeder fault | DC resistance deviation 3.1%, capacitance deviation 6.8% | LV winding S-bend, spacer shift, paper debris | LV winding replaced |
| 110 kV / 50 MVA | Gas generation after external short circuit | H2 rose to 410 ppm, C2H2 to 18 ppm | Lead support carbonization, winding displacement | Insulation and support rebuild |
| 220 kV / 180 MVA | Abnormal core grounding current after overhaul | Core grounding test abnormal | Reassembly insulation damage causing multi-point grounding | Reopened and corrected core insulation |
| 10 kV / 5 MVA | Phase resistance imbalance after fault trip | One phase +4.5% versus history | Broken strand near lead connection | Local repair and retest |
| 66 kV / 31.5 MVA | Repeated unstable insulation readings | Poor insulation trend after oil filling | Moisture retained in replacement insulation block | Vacuum dehydration and hot-oil drying |
FAQ
How do you diagnose transformer short-circuit damage quickly?
Use a staged process: start with gas and oil analysis, continue with electrical tests such as DC resistance and capacitance comparison, and then perform internal inspection if abnormal evidence appears. This sequence finds both hidden and visible damage with better accuracy.
What is the best test for transformer windings after a fault?
There is no single best test in isolation, but DC resistance combined with winding capacitance comparison is one of the most practical first-line methods. Together, they are highly effective for detecting conductor damage, displacement, and deformation after fault current exposure.
Can a transformer survive a sudden short circuit without internal damage?
Yes, it can, but only if its mechanical short-circuit withstand strength is sufficient, and all post-fault checks confirm no deformation, insulation failure, or structural displacement. A clean external appearance alone does not prove internal health.
What are the signs of transformer insulation failure after short circuit?
Typical signs include abnormal dissolved gas analysis, insulation debris inside the tank, burn marks, reduced dielectric performance, unstable insulation test results, and displaced internal supports. These signs should be evaluated together rather than separately.
When should a damaged transformer winding be replaced instead of repaired?
The winding should be replaced when deformation is severe, insulation has collapsed, conductors are broken, or multiple test methods confirm irreversible mechanical damage. In such cases, partial correction usually does not restore reliable short-circuit strength.
How long should a transformer rest after oil filling before insulation testing?
A 24-hour rest period is commonly required. This allows the oil to fully penetrate the insulation system and reduces the risk of distorted readings caused by trapped air or uneven moisture distribution.
What causes transformer core damage after short-circuit faults?
Axial and transmitted mechanical forces can shift laminations, stress through-bolt insulation, deform clamp parts, and create grounding defects. Core damage often appears as a secondary effect of major winding movement.
How can transformer repair be improved to resist future short circuits?
Use stronger winding materials, improve clamping structure, maintain strict drying control, install tested insulation parts, and choose designs verified for short-circuit withstand capability. Good repair should increase both electrical and mechanical reliability.
Conclusion: The Correct Logic for Diagnosing and Fixing Short-Circuit Transformer Damage
The correct diagnosis logic is clear: oil and gas analysis first, electrical testing second, and teardown inspection third. This sequence gives the most reliable basis for judging whether the transformer suffered winding deformation, insulation damage, or structural displacement.
Prevention is equally important. Selecting transformers with stronger short-circuit withstand design, using better winding materials, and following strict repair workmanship standards can greatly reduce the risk of permanent damage after future fault events.
For operators, utilities, EPC teams, and industrial plants that need dependable post-fault assessment, Weisho Electric stands out as a valuable technical partner. From repair review to transformer condition evaluation and short-circuit resilience planning, Weisho Electric brings the engineering focus needed to reduce repeat failures and return equipment to service with greater confidence.
Get a Professional Post-Fault Transformer Assessment
If your transformer has experienced a short-circuit event, do not rely on guesswork or one isolated test. Request a professional review before re-energization.
Contact Weisho Electric today for a complete transformer short-circuit damage diagnosis plan, a post-fault transformer electrical testing checklist, and expert guidance on repairing transformer mechanical deformation and preventing repeat insulation failure.
Act before the next energization attempt. A proper assessment now can prevent catastrophic repeat damage, unplanned outage, and far greater replacement cost later.